SpringBoot日志处理 默认情况下,SpringBoot会引入spring-boot-starter-logging,也就是logback的日志实现。
在resources下新建logback-spring.xml可以自定义日志配置,这是约定的文件名字。
在spring-boot-starter-logging-2.1.4.RELEASE这个依赖中,在/org/springframework/boot/logging/logback/base.xml位置可以找到SpringBoot提供的一个默认配置,基于这个配置进行自定义
1
2
3
4
5
6
7
8
<?xml version="1.0" encoding="utf-8" ?> <Configuration > <include resource ="org/springframework/boot/logging/logback/base.xml" /> <logger name ="com.test.springlecture" level ="DEBUG" /> <springProfile name ="default" > <logger name ="com.test.springlecture" level ="INFO" /> </springProfile > </Configuration >
可以指定不同的springProfile,可以做到当在开发环境的时候打印debug日志,在生产的时候则打印info。
也可以直接在application.yml里配置日志级别:
1
2
3
logging: level: root: debug
SprintBoot整合JSP 现在用JSP的项目应该已经很少了,大部分都是前后端分离的项目。不过SpringBoot还是提供了对JSP的支持。
在SpringBoot中访问jsp,需要新增一个依赖,没有这个依赖,SpringBoot是无法编译jsp文件的。
1 'org.apache.tomcat.embed:tomcat-embed-jasper'
以及路径配置:
1
2
3
4
5
spring: mvc: view: prefix: /WEB-INF/jsp suffix: .jsp
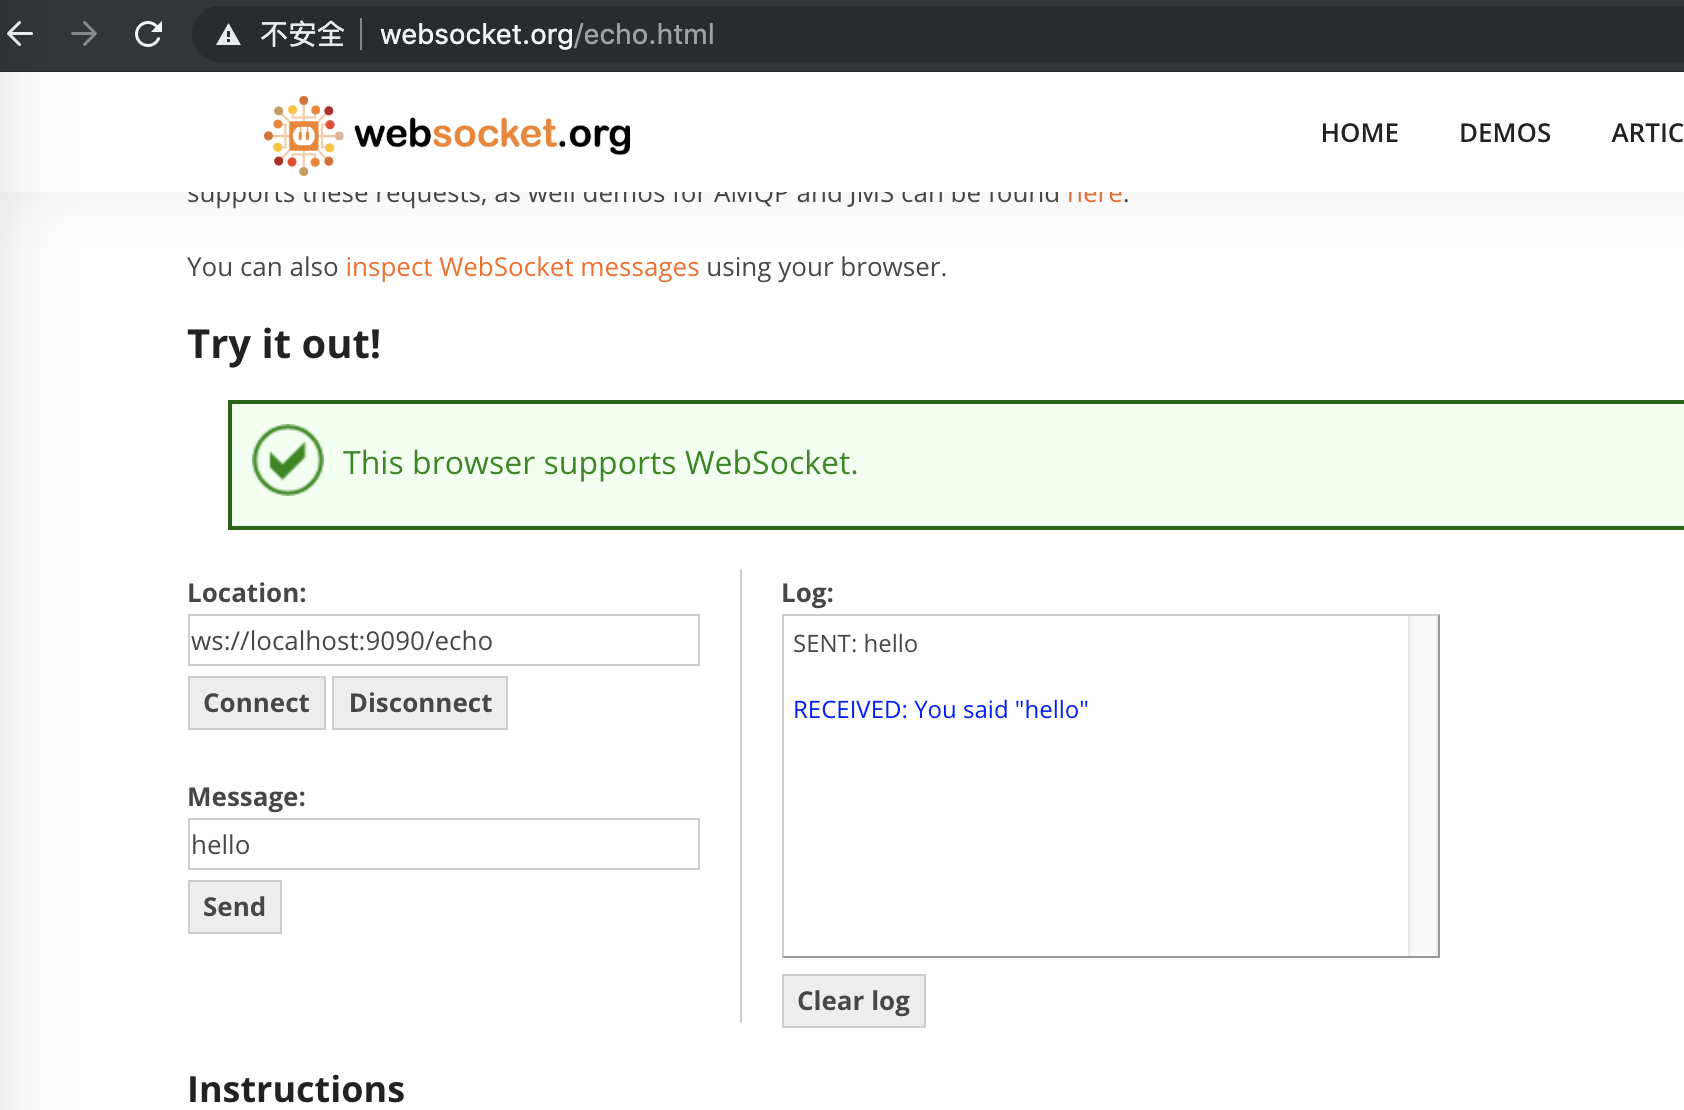
SpringBoot整合WebSocket SpringBoot对WebSocket也提供了强有力的支持,这里简单介绍一下如何在SpringBoot里开发WebSocket接口,首先引入依赖
1
2
'org.springframework.boot:spring-boot-starter-websocket', 'org.springframework.boot:spring-boot-starter-json'
1 2 3 4 5 6 7 public interface EchoService { String getMessage (String message) ; }
1 2 3 4 5 6 7 8 9 10 11 12 13 14 15 16 public class DefaultEchoService implements EchoService { private final String echoFormat; public DefaultEchoService (String echoFormat) { this .echoFormat = echoFormat != null ? echoFormat : "%s" ; } @Override public String getMessage (String message) { return String.format(this .echoFormat, message); } }
上面是用户的业务代码,下面是要实现TextWebSocketHandler,对WebSocket连接进行处理。
1 2 3 4 5 6 7 8 9 10 11 12 13 14 15 16 17 18 19 20 21 22 23 24 25 26 27 28 public class EchoWebSocketHandler extends TextWebSocketHandler { private EchoService echoService; public EchoWebSocketHandler (EchoService echoService) { this .echoService = echoService; } @Override public void afterConnectionEstablished (WebSocketSession session) throws Exception { System.out.println("连接建立" ); } @Override public void handleTransportError (WebSocketSession session, Throwable exception) throws Exception { session.close(CloseStatus.SERVER_ERROR); } @Override protected void handleTextMessage (WebSocketSession session, TextMessage message) throws Exception { String echoMessage = echoService.getMessage(message.getPayload()); session.sendMessage(new TextMessage (echoMessage)); } }
最后对所有的类进行配置,注意添加@EnableWebSocket注解和实现WebSocketConfigurer:
1 2 3 4 5 6 7 8 9 10 11 12 13 14 15 16 17 18 19 20 21 22 23 24 25 @Configuration @EnableWebSocket public class WebSocketConfig implements WebSocketConfigurer { @Override public void registerWebSocketHandlers (WebSocketHandlerRegistry registry) { registry.addHandler(webSocketHandler(), "/echo" ).setAllowedOrigins("*" ); } @Bean public EchoService echoService () { return new DefaultEchoService ("You said \"%s\"" ); } @Bean public WebSocketHandler webSocketHandler () { return new EchoWebSocketHandler (echoService()); } }
测试页面
http://www.websocket.org/echo.html
SpringBoot单元测试 SpringBoot为单元测试提供了非常方便的集成,引入依赖:
1 'org.springframework.boot:spring-boot-starter-test'
编写单元测试类:
1 2 3 4 5 6 7 8 9 10 11 12 13 14 15 16 17 18 19 20 21 22 23 24 25 26 27 @RunWith(SpringRunner.class) @SpringBootTest public class MyControllerTest { @Autowired private WebApplicationContext webApplicationContext; private MockMvc mockMvc; @Before public void setUpMockMvc () { mockMvc = MockMvcBuilders.webAppContextSetup(webApplicationContext).build(); } @Test public void testGetPerson () throws Exception { mockMvc.perform(MockMvcRequestBuilders.get("/api/person" ) .contentType(MediaType.APPLICATION_JSON_UTF8) .accept(MediaType.APPLICATION_JSON_UTF8)) .andExpect(MockMvcResultMatchers.status().isOk()) .andDo(MockMvcResultHandlers.print()); } }
控制台输出结果:
1
2
3
4
5
6
7
8
9
10
11
12
13
14
15
16
17
18
19
20
21
22
23
24
25
26
27
28
29
30
31
32
33
34
35
36
MockHttpServletRequest: HTTP Method = GET Request URI = /api/person Parameters = {} Headers = [Content-Type:"application/json;charset=UTF-8", Accept:"application/json;charset=UTF-8"] Body = null Session Attrs = {} Handler: Type = com.test.springlecture.controller.MyController Method = public com.test.springlecture.domain.Person com.test.springlecture.controller.MyController.getPerson() Async: Async started = false Async result = null Resolved Exception: Type = null ModelAndView: View name = null View = null Model = null FlashMap: Attributes = null MockHttpServletResponse: Status = 200 Error message = null Headers = [Content-Type:"application/json;charset=UTF-8"] Content type = application/json;charset=UTF-8 Body = {"id":18,"name":"张三","birthday":"2019-11-23T09:59:18.761+0000"} Forwarded URL = null Redirected URL = null Cookies = []
SpringBoot重要组件就介绍到这里,后面的文章会介绍Apache kafka的使用以及和SpringBoot应用的集成。
本文涉及到的源码:https://github.com/sail-y/spring-cloud-lecture/tree/master/spring-lecture
总结 本文系统讲解了技术要点,通过学习掌握核心知识和实践方法。